Tutorials
/ ASP.NET Core
/ DocuVieware integration in .NET Core 3.0 web application
DocuVieware integration in .NET Core 3.0 web application
In This Topic
Overview
This tutorial will show you how to integrate DocuVieware™ in a newly created C# .NET Core MVC Web Application project with Razor view engine.
Requirements
Here are the necessary requirements:
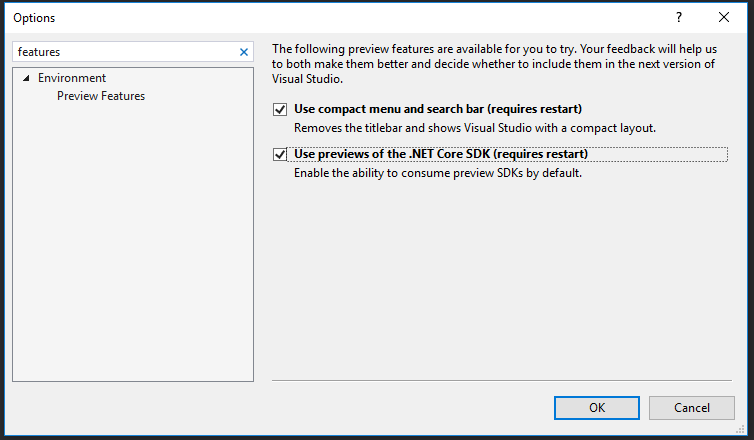
In Visual Studio 2019, you need to enable Preview Features:
Open Tools > Options > Environment > Preview Features and select "Use previews of the .NET Core SDK" checkbox.
Empty project creation
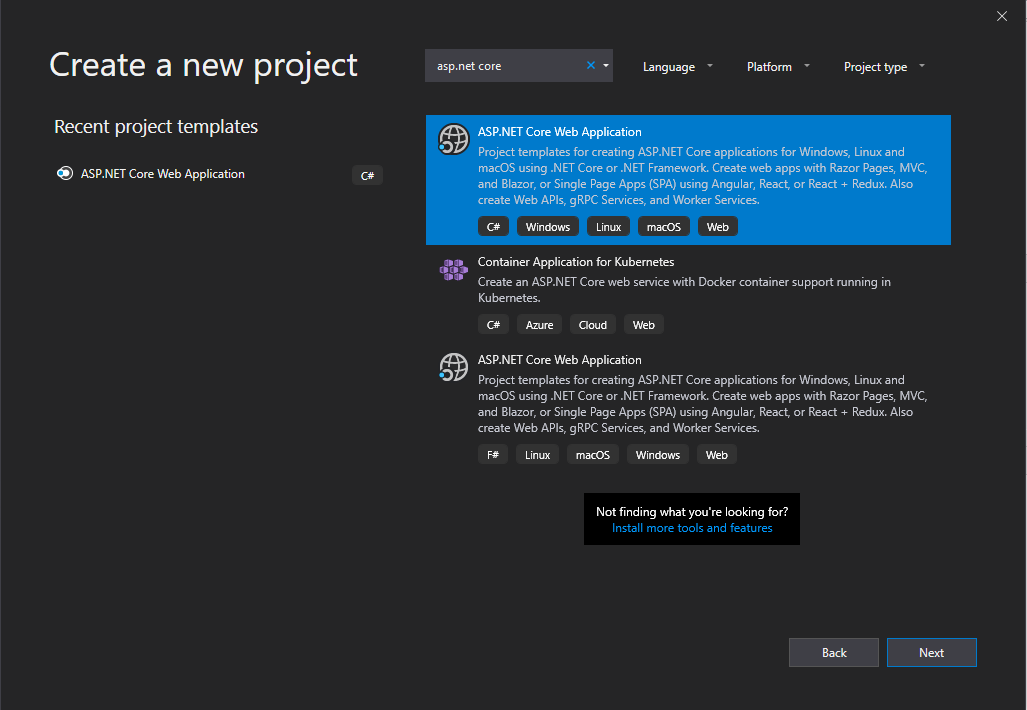
Start with the File > New > Project... menu, then in Visual C# choose ASP.NET Core Web Application, please refer to the screenshot below.
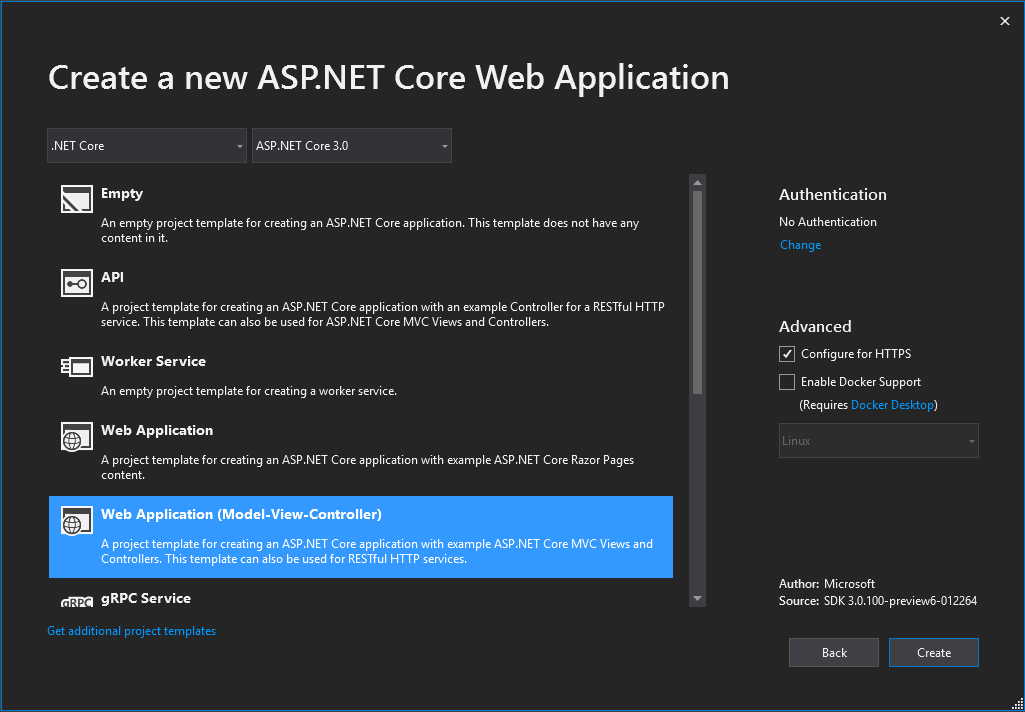
On the next page choose .NET Core with ASP.NET Core 3.0 and select Web Application MVC, please refer to the screenshot below.
Now that the project structure is ready, the next step will be to add project references and set up the project configuration.
Setting up the project configuration
Step 1: The first is to add the reference to GdPicture.NET.14.WEB.DocuVieware.Core.dll that is found in:
[INSTALLATION FOLDER]\Redist\DocuVieware (.NET Core 3.0)
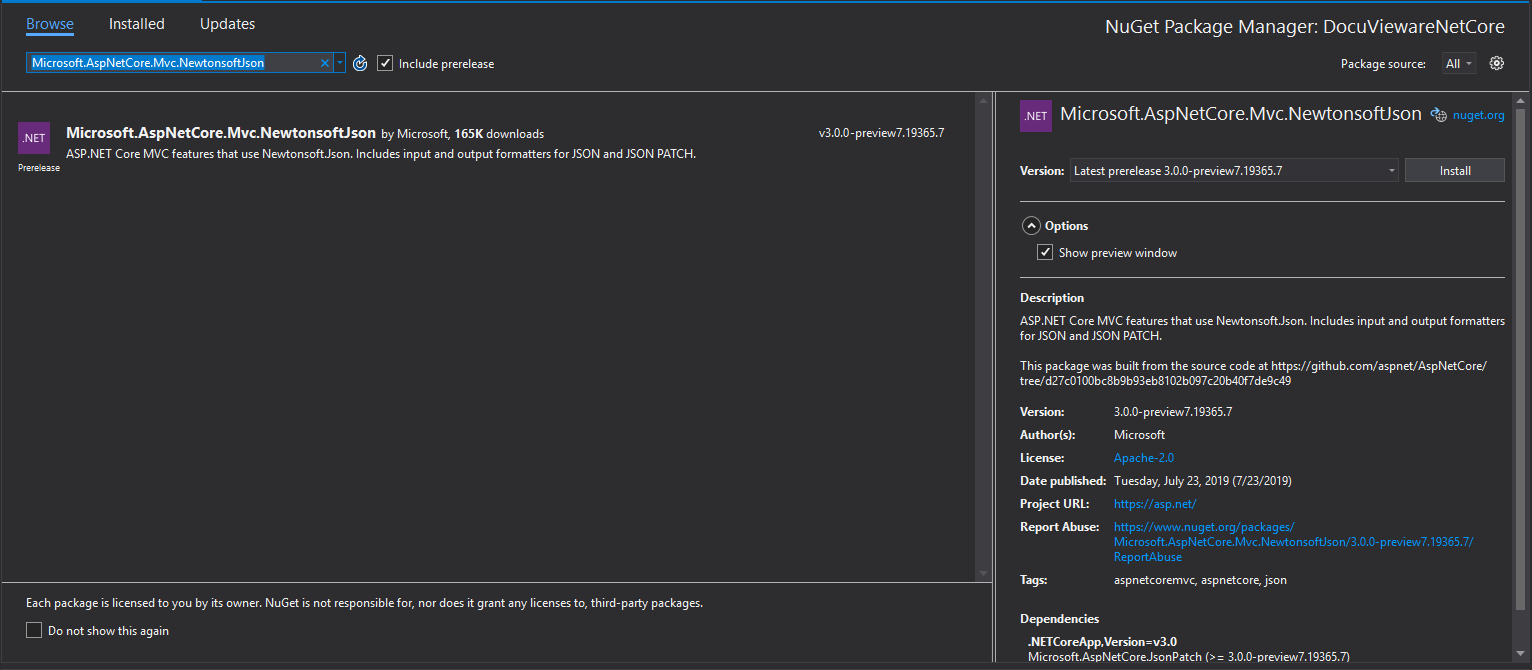
Step 2: It is required to also add Microsoft.AspNetCore.Mvc.NewtonsoftJson with NuGet manager:
Step 3: You also need to add DocuVieware™ own JavaScript and CSS to the project, docuvieware-min.js and docuvieware-min.css, both found in:
[INSTALLATION FOLDER]\Redist\DocuVieware (Resources)\
Simply add them to the css and js folders of the project.
Step 4: Finally, you also need to download jquery.min.js, for example from https://jquery.com/download/ or you can use also one attached to our samples. It is simply because this file will not be added automatically when creating the project.
Setting up licensing
Now that the references are properly set, you need to go to the Startup.cs file of the project to add some mandatory imports and handle the licensing part of DocuVieware™.
You will probably need to import some dlls, please refer below.
To properly unlock DocuVieware™ you are going to add a call to the RegisterKEY() method in the Startup method that is called on runtime. Then please enter your license key in the method.
Configuring DocuVieware
Next step is to properly set up the core configuration of DocuVieware™ through the DocuViewareManager.SetupConfiguration() method. Add this call right after unlocking DocuVieware™.
Finally, you need to add this code to the ConfigureServices method in order to get the DocuVieware™ reference to work in the Razor views it will be integrated in.
Here is what the Startup.cs file should look like at this point:
DocuVieware integration
First, you need an additional controller to handle and route the DocuVieware™ actions. Simply create a new controller called DocuVieware3Controller.cs in the project's Controllers folder as follow:
You are going to integrate a DocuVieware™ instance in the Index view, but of course the exact same applies to any other view or content.
For the sake of clarity, replace the entire content of the Index view, remove other views and the shared layouts as well, you won't use them in this tutorial.
Create a div in Index.cshtml and insert the DocuVieware™ control in it. Then create a new DocuVieware™ object in the div and set its properties.
Here is what the Index.cshtml finally looks like after the integration is complete:
You can find the sample and mentioned source codes in this folder: [INSTALLATION FOLDER]\Samples\ASP.NET\DocuVieware (.NET Core)\aspnetcore-mvc_razor_app
That’s it! You can start the project and load documents in your brand new DocuVieware™.