This tutorial will show you how to serve DocuVieware™ to another application through a newly created C# REST service project with ASP.NET Web API 2 from the .NET Framework.
Serving DocuVieware through a REST API
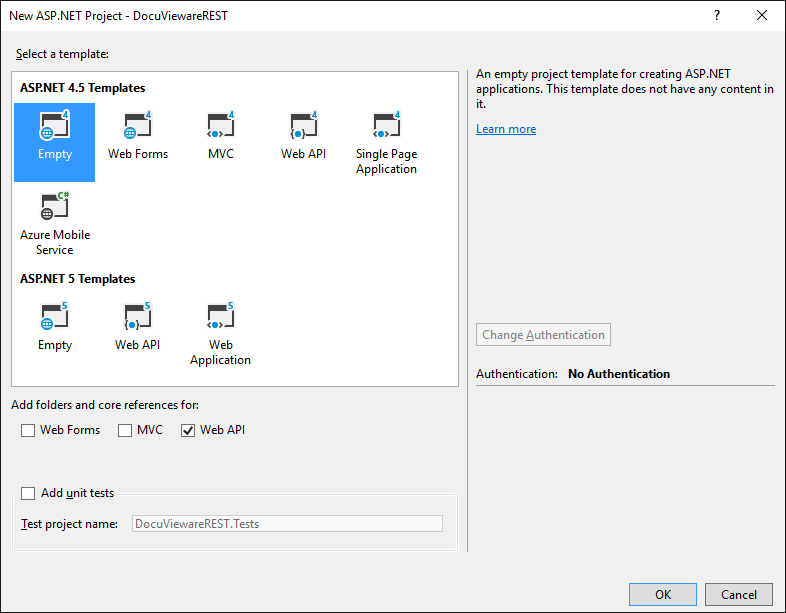
Start with the File > New > Project... menu, then choose Web > ASP.NET Web Application. In this tutorial, the new ASP.NET 4.6 empty Web API project has been named DocuViewareREST.
Here is the structure obtained:
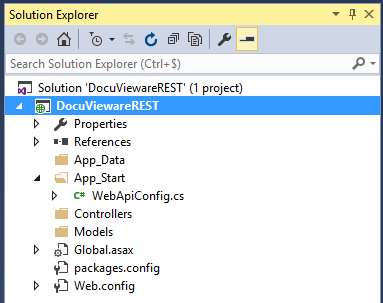
Now that the project structure is ready, the next step will be to add project references.
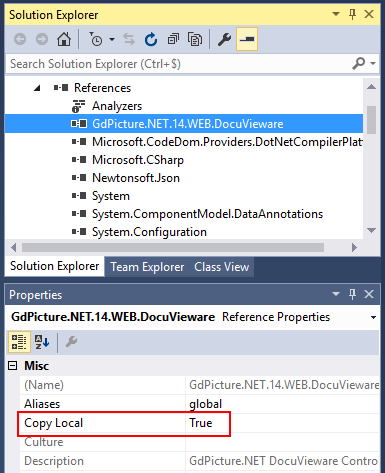
Add a reference to GdPicture.NET.14.WEB.DocuVieware.dll that is found in [INSTALLATION FOLDER]\Redist\DocuVieware (.NET Framework 4.6)\.
Once added, make sure it is marked as Copy Local : True in its properties window: https://msdn.microsoft.com/library/t1zz5y8c(v=vs.100).aspx
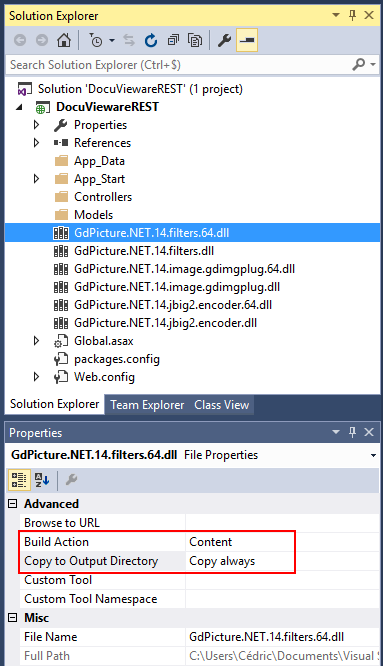
You also need to take care of extra libraries that are mandatory for deployment, those files are found in [INSTALLATION FOLDER]\Redist\
- GdPicture.NET.14.filters.dll (for a 32-bit execution)
- GdPicture.NET.14.filters.64.dll (for a 64-bit execution)
- GdPicture.NET.14.image.gdimgplug.dll (for a 32-bit execution)
- GdPicture.NET.14.image.gdimgplug.64.dll (for a 64-bit execution)
- GdPicture.NET.14.Imaging.Rendering.Skia.dll (for a 32-bit execution)
- GdPicture.NET.14.Imaging.Rendering.Skia.64.dll (for a 64-bit execution)
- GdPicture.NET.14.jbig2.encoder.dll (for a 32-bit execution)
- GdPicture.NET.14.jbig2.encoder.64.dll (for a 64-bit execution)
They need to be added to the project (using the Add > Existing item... menu, browse and then Add, not Add as link) and once done, the "Build Action" property should be set to "Content" and the "Copy to Output Directory" property should set to "Copy always" for each file.
Now that the references are properly set, you need to go to the Global.asax.cs file of the project to add some mandatory imports and handle the licensing part and the configuration part of DocuVieware™ as well.
Here is the mandatory import you need to add.
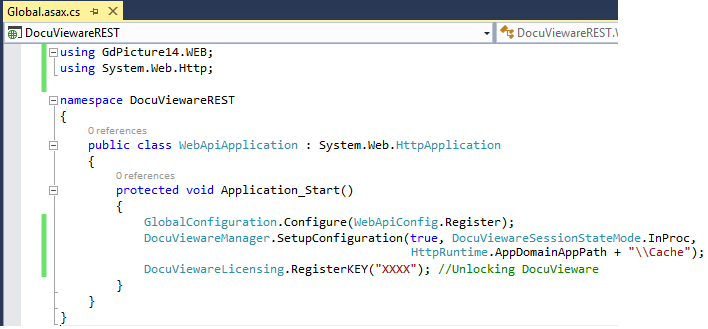
To properly unlock DocuVieware™ you are going to add a call to the RegisterKEY() method in the Application_Start event. Then please enter your license key in the method.
To set up the configuration of DocuVieware™ you are going to add a call to the DocuViewareManager.SetupConfiguration() method in the Application_Start event. At this point you need to create a new folder in the project that will be used for cache, for the sake of clarity simply name it Cache.
Here is what the Global.asax.cs file should look like at this point:
Step 1: Create a new folder in the project root called Cache that will be used later on to store session data when the service will be running.
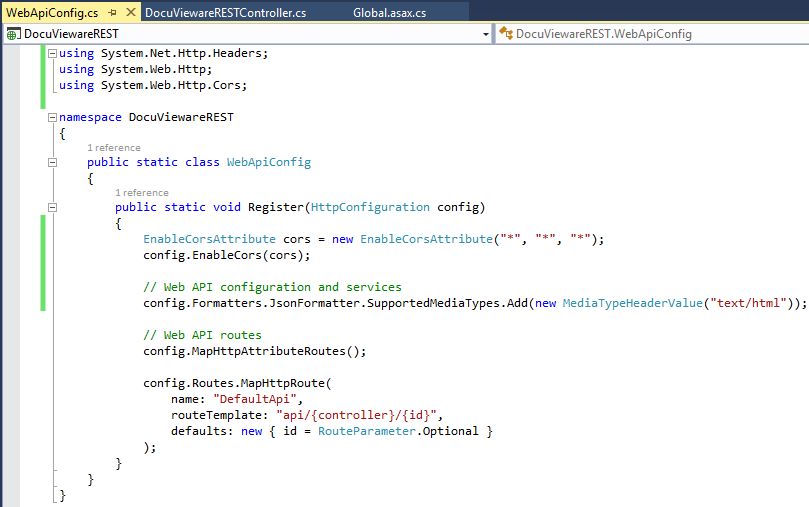
Step 2: For convenience, easy reusability and maximum compatibility, the service will receive and send data using JSON data format. All the required referencies are already part of Web API project so all you need to do is add the proper configuration line in the WebApiConfig.cs file in the project's App_Start folder as follow:
Step 3: You most probably need to allow Cross Origin Resource Sharing (CORS) in the project as well so the service can be accessed from other applications that might not be hosted on the same server.
You need to execute the following command in your Package Manager Console (from the Tools menu, select NuGet Package Manager and then click Package Manager Console):
PM> Install-Package Microsoft.AspNet.WebApi.Cors
Then, once the packge has been installed, you can add your CORS configuration in the WebApiConfig.cs file as follow:
Once done, your WebApiConfig.cs file looks like this:
If you want to set specific restriction for CORS, please refer to this page: https://docs.microsoft.com/en-us/aspnet/web-api/overview/security/enabling-cross-origin-requests-in-web-api
It is necessary to define the data sent and received by the REST service.
Step 1: Simply right click on the Models folder, Add > Class... Create a DocuViewareConfiguration class to define the input data (the DocuVieware™ control configuration). Open it and add the content definition as follow:
Step 2: Within the Models folder, create another class named DocuViewareRESTOutputResponse to define the data the REST service will send back. As it will be HTML content, here is the required definition:
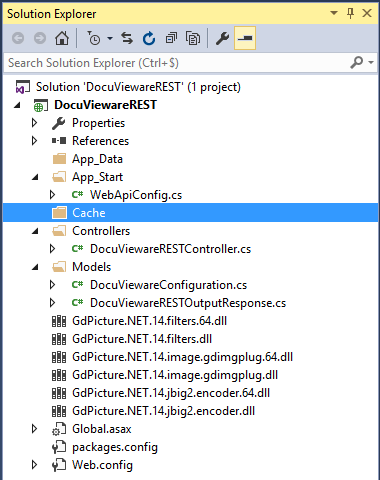
Here is your project content at this point:
Step 3:
Add a new controller to the project with a right click on the Controllers folder, Add > Controller... Choose Web API 2 Controller - Empty and click the Add button. Let's call it DocuViewareRESTController.
Proceed with the service method definition in DocuViewareRESTController.cs. Only one method is required, it will respond to the POST verb. It receives the configuration object (DocuViewareConfiguration) and returns the response (DocuViewareRESTOutputResponse).
This unique method checks for an existing session identified by the SessionId value by the mean of the DocuViewareManager.IsSessionAlive static method. If the session exists, the method uses the existing session. If it doesn't exist, the method creates a new session from this identifier using the DocuViewareManager.CreateDocuViewareSession static method.
The received configuration is then applied to a new DocuVieware object and finally, the resulting HTML markup is sent back.
Here is the C# implementation of this POST method:
That’s it! You can start the service and serve DocuVieware™ to any other application that is able to consume a REST service.
The next step is the control integration, it is detailed in several tutorials, each one corresponding to a different language.