How to create a universal document viewer .NET using WPF for your applications
Table of contents
There aren't many easy to use document viewer .net sdks around, specifically built for your use case.
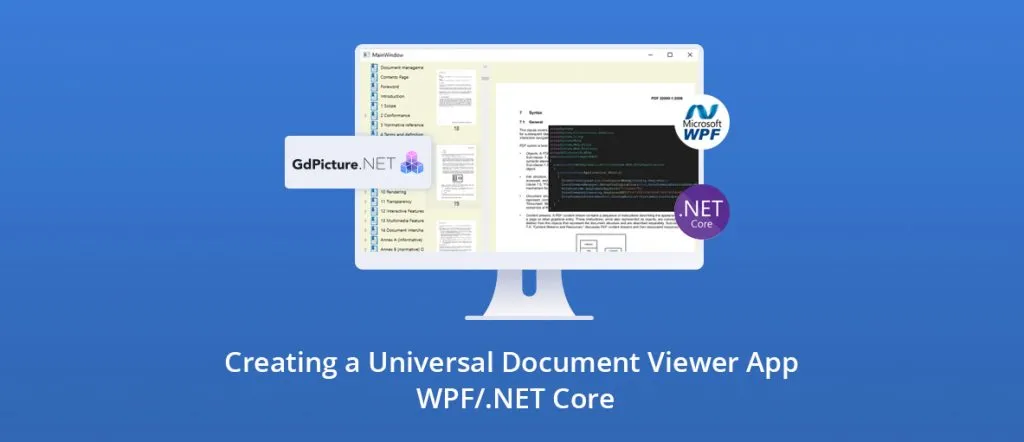
Windows Presentation Foundation (WPF) is a popular framework for making .NET applications. In addition to built-in controls, WPF supports the use of other control libraries to access new functionality, such as viewing and modifying several document formats with GdPicture.NET.
With this single control, an application can view and edit images, PDFs, and other document types including Word and Excel documents.
GdPicture.NET works with .NET Core 3.0 and later. Over 100 different file formats are supported including PNG, SVG, Photoshop, PDF, Word documents, and many more. GdPicture.NET includes support for images with color depths from 1-bit to 128-bit and several color formats.
A list of the supported document types is listed at https://www.gdpicture.com/solutions/supported-formats/(opens in a new tab).
To demonstrate how easy the control is to use I will create a document viewer application using the control.
Installing GdPicture.NET
To install GdPicture .NET, download and run the installer from (opens in a new tab)https://www.gdpicture.com/download-gdpicture/(opens in a new tab).
The only option to choose is the location in which the installer will place the files. A license key is necessary to use the components, and you can get a free trial license.
To request a license, open the location where you installed the SDK and run the file licenseManager.exe. Select the Request a trial key option.

After entering and submitting registration information, a license key will be sent to your email address. This key is used within applications that use GdPicture.NET.
Configuring a GdPicture.NET Project
Now that the SDK is installed, let’s create a document viewer using GdPicture.NET.
Open Visual Studio and create a new WPF App (.NET Core) project.
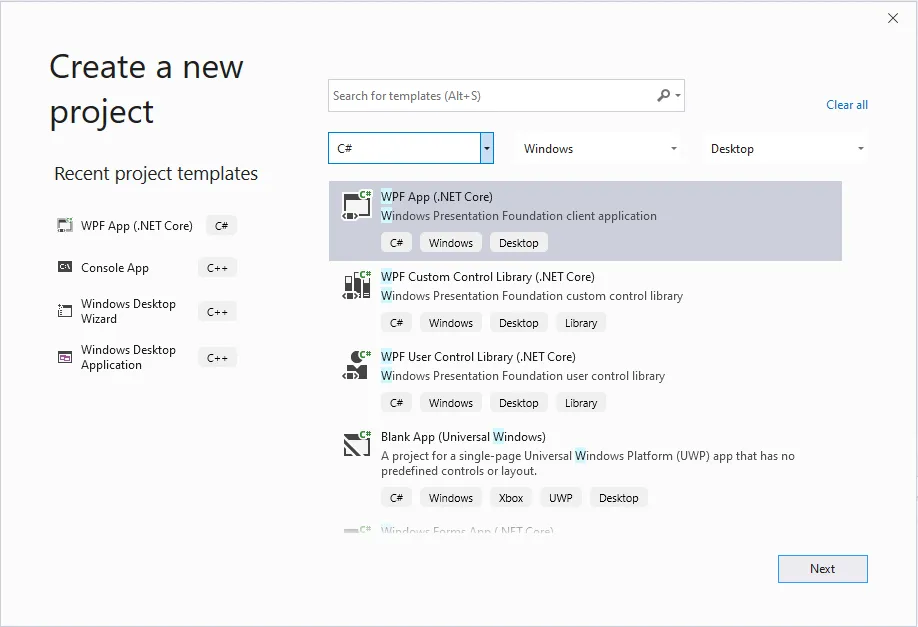
Enter a name for the project and select the location for the project. Click Create and Visual Studio will create the new project.

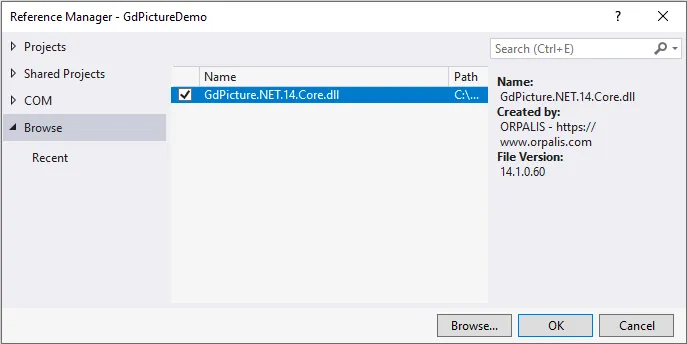
The new application needs a reference to GdPicture.NET. In the project’s Solution Explorer, right-click Dependencies and select Add Reference to open the Reference Manager. Browse to the installation location and select \GdPicture.NET\Redist\GdPicture.NET (.NET Core)\GdPicture.NET.14.Core.dll.
To use the components, the registration key must be added to the application. To do this LicenseManager.RegisterKEY accepts a string that contains the key. We will make this call within the constructor for the application window.
Open the C# file for the window (MainWindow.xaml.cs) and add the following line to the top of the file
using GdpPicture14;
In the constructor after the line InitializeComponent(), create a new LicenseManager instance and call RegisterKEY using your key value. After the change the constructor will look like this:
publicMainWindow() { InitializeComponent(); LicenseManager lm = new LicenseManager(); lm.RegisterKEY("YOUR_KEY_HERE"); }
Creating the Document Viewer .NET
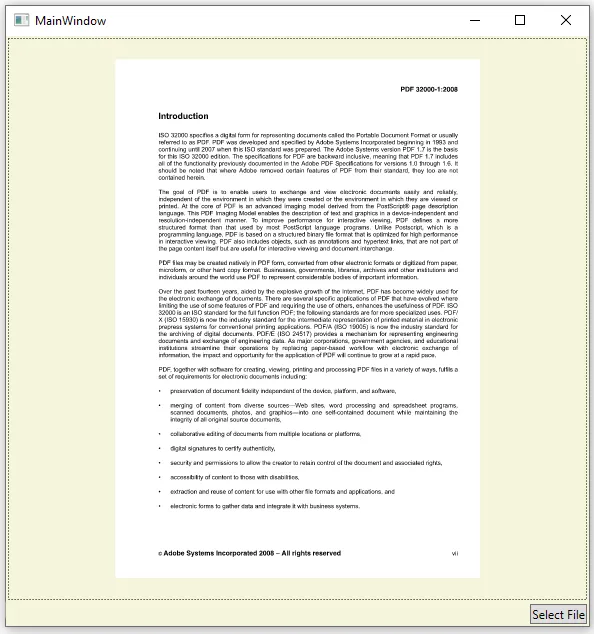
Within the XAML for the application I am adding a GdViewer control along with a “Browse” button for selecting a file. This application will allow someone to select a supported file type and display it in the GdViewer control.
In the first element of the XAML file there are several namespaces declared. I am adding the GdPicture.NET library to the namespace declarations and have decided to use the abbreviation gdp for the namespace.
xmlns:gdp="clr-namespace:GdPicture14.WPF;assembly=GdPicture.NET.14.Core"
A simple interface allowing a user to browse to a document and open it for the viewer can be made with a Button control and the GdPicture.NET GdViewer control. This is the XAML describing the layout.
<Window x:Class="DownloadMiles.MainWindow" xmlns="http://schemas.microsoft.com/winfx/2006/xaml/presentation(opens in a new tab)" xmlns:x="http://schemas.microsoft.com/winfx/2006/xaml(opens in a new tab)" xmlns:d="http://schemas.microsoft.com/expression/blend/2008(opens in a new tab)" xmlns:mc="http://schemas.openxmlformats.org/markup-compatibility/2006(opens in a new tab)" xmlns:local="clr-namespace:DownloadMiles" mc:Ignorable="d" xmlns*:gdp="clr-namespace:GdPicture14.WPF;assembly=GdPicture.NET.14.Core" ** Title="MainWindow" Height="450" Width="800"> <Grid> <Grid.RowDefinitions> <RowDefinition Height="" /> <RowDefinition Height="auto" /> </Grid.RowDefinitions> **<gdp:GdViewer x:Name="viewer" /> <Button Grid.Row="1" x:Name="BrowseButton" > Select File </Button> ** </Grid> </Window>
Before running the application, add the code for responding to clicks on the Browse button. In this code the OpenFileDialog is displayed. If the user selects a file, that file is passed to the view control through the function DisplayFromFile().
void LoadFile(String path) { viewer.DisplayFromFile(path); } private void BrowseButton_Click(object sender, RoutedEventArgs e) { OpenFileDialog ofd = new OpenFileDialog(); ofd.Multiselect = false; ofd.Filter = "All Files|."; var result = ofd.ShowDialog(); //Only read the selected file name if the user closed //the open file dialog by selecting a file and clicking //on "OK" if (result.HasValue && result.Value) LoadFile(ofd.FileName); }
Compile and run the code. The control already has functionality for responding to mouse actions. Once the document is displayed, you can move around in the viewer by clicking and dragging with the mouse and zoom in and out with the mouse wheel.
Page Navigation
Using the navigation methods on GdView, we can add a navigation control UI. The methods the UI will use to control GdView are:
- DisplayPage()
- DisplayPreviousPage()
- DisplayNextPage()
- DisplayFirstPage()
- DisplayLastPage()
Most of these methods are called through buttons on the UI. A TextBox control allows the user to enter a page number. The value typed here is applied using DisplayPage().
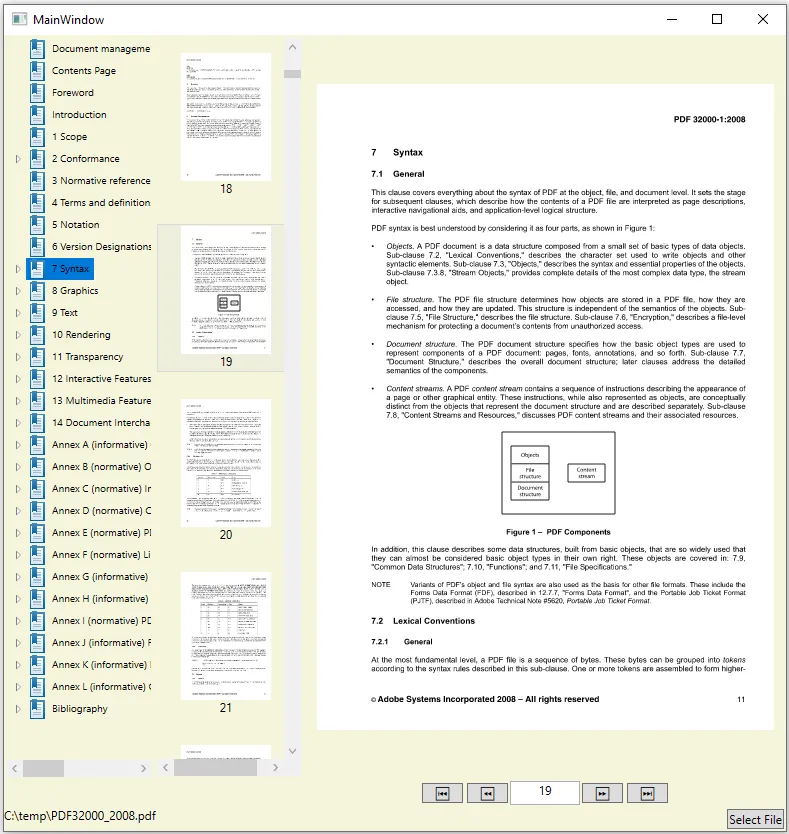
In large documents a user may need a way to quickly identify pages in a document and jump directly to a page. The control ThumbnailEx is made for this purpose. The control shows a list of small versions of the pages of a document. Users can scan through them quickly and select the page they are looking for.
The ThumbnailEx control and the GdViewer control can be synchronized with each other; selecting a page from the ThumbnailEx control results in the same page shown in full size in the GdView control.
<gdp:ThumbnailExx*:Name="thumbnails"********/> *gdp:GdViewerx:Name="viewer""PageChanged="viewer_PageChanged"/ voidLoadFile(String path) { viewer.DisplayFromFile(path); *thumbnails.LoadFromGdViewer(viewer); *}
When you run the program, all the pages of the document show in the thumbnail area.

Often the contents of a document are organized in a hierarchy, such as a table of contents with multiple levels. The BookmarksTree control is made for showing these headings and allows a user to quickly jump to them.
Much like the ThumbnailEx control, you populate the BookmarkTrees control by pairing it with a GdView and it stays synchronized with the page that GdView displays. Both controls are used in the document viewer that I’m building here.
With the XAML for the new element added we have the following three declarations for showing the GdPicture.NET BookmarkTree control, the ThumbnailEx control, and the GdViewer control.
<gdp:BookmarksTreex:Name="bookmarks" /> gdp:ThumbnailExx:Name="thumbnails/ gdp:GdViewerx:Name="viewer"PageChanged="viewer_PageChanged"/
The function to load a new document populates the BookmarksTree control from GdViewer.
voidLoadFile(String path) { viewer.DisplayFromFile(path); thumbnails.LoadFromGdViewer(viewer); bookmarks.LoadFromGdViewer(viewer); }
Printing Documents with GdPicture.NET
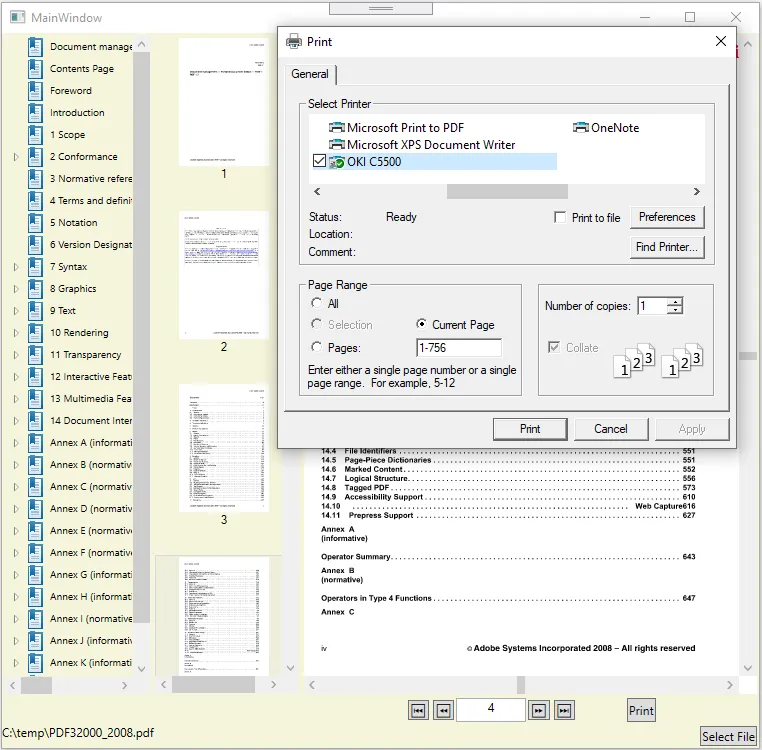
GdViewier makes printing especially easy. The control has a method named PrintDialog() that shows the user the standard Windows printing interface.
The user can change the settings to print the entire document or only a range or specific pages. Within the code there are two items of information that the PrintDialog method needs: a PrintSizeOption value and the window that owns the print dialog.
For the owner parameter we can pass the this (opens in a new tab)value (the application window). PrintSizeOption has three values:
- Printing a document in its actual size (PrintSizeOptionActual).
- Shrinking or growing the page contents to fill a complete page (PrintSizeOptionFit).
- Adjusting the size of content if it would not otherwise fit within a page (PrintSizeOptionShrinkOversized).
privatevoid printButton_Click(object sender, RoutedEventArgs e) { viewer.PrintDialog(PrintSizeOption.PrintSizeOptionShrinkOversized, this); }
Combining Documents
There are cases where it is necessary to gather several individual documents and bring them together into a single document. Imagine an expense system where all the receipts for a business trip must be included in the same document.
Or a system where several business components are producing their own documents and the documents are to be brought together for a report or statement.
The separate documents are easily brought together into one document with GdPicture.NET. The class GdPictureDocumentConverter provides the method CombineToPDF for this purpose. It needs a list of the locations for the source documents and a stream (opens in a new tab)to write the resulting document to.
privatevoid SaveCombinedFiles_Click(object sender, RoutedEventArgs e) { //making a list of the file names **List<String> fileNameList = new List<string>(); *foreach (String item in FileListBox.Items) fileNameList.Add(item); //Let the user decide where the end file will be written SaveFileDialog sfd = new SaveFileDialog(); sfd.Filter = "PDF Document|.pdf"; var result = sfd.ShowDialog(); if(result.HasValue && result.Value) { _combinedFileName = sfd.FileName; using (Stream saveStream = sfd.OpenFile()) { using (GdPictureDocumentConverter gdpdc = new GdPictureDocumentConverter()) { gdpdc.CombineToPDF(fileNameList, saveStream); } } this.DialogResult = true; this.Close(); } }
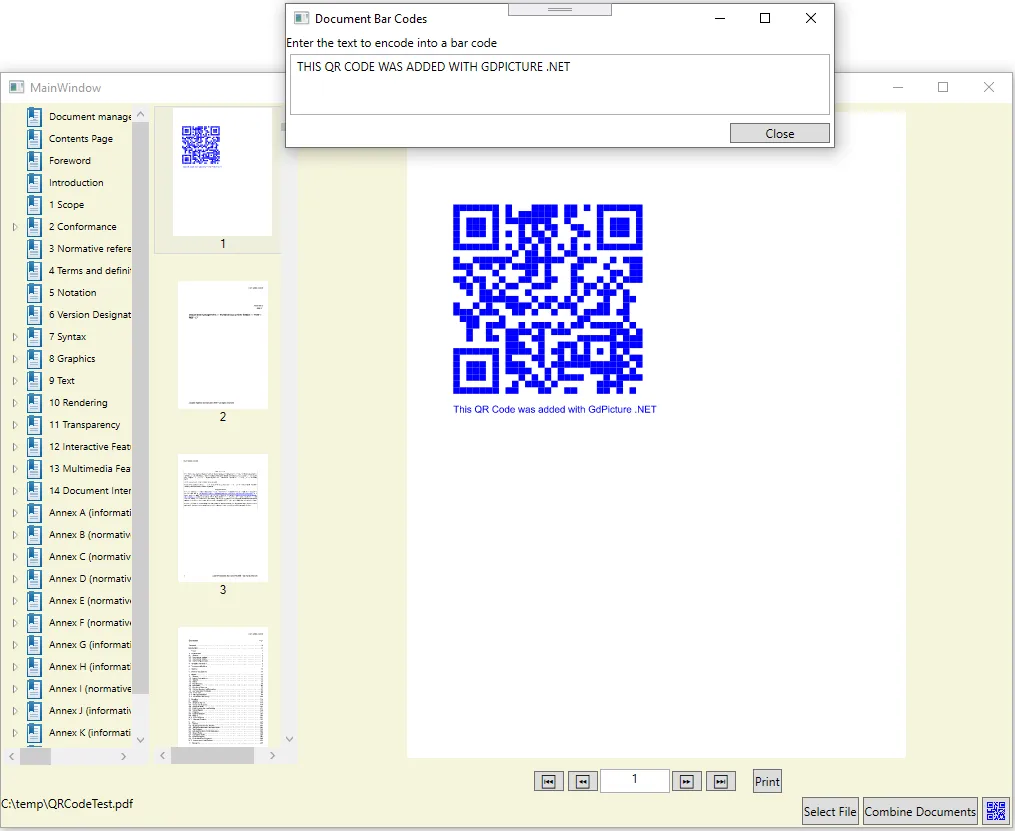
Creating and Reading Document Barcodes
GdPaint.NET also includes support to both read and create various types of barcodes. This includes QR codes, UPC codes, Code39, and many others.
Barcodes are sometimes placed in documents to support automatic actions when a document enters a system. To demonstrate, let's update the document viewer to look for QR codes on the first page of a document.
There could be more than one QR code on the page. If you don’t have a document with a QR code, you can easily make one — our document viewer is getting an option to add a page to the beginning of a document with a QR code.
GdPicture.Net provides a class named GdPicturePDF that we can use for modifying documents. We load a document with this control and add a new page to it. On the new page, we draw a QR code along with the plain text that is encoded within the QR code.
New pages are always added to the end of the document. To put the page in the desired place GdPicturePDF has the MovePage method that lets us move the page to the desired location within the document.
Instead of saving the modified document over the original file, our document viewer will ask the user to choose a new location and file name for the modified document.
SaveFileDialog sfd = new SaveFileDialog(); sfd.Filter = "PDF Document|*.pdf"; result = sfd.ShowDialog(); if (!result.HasValue || !result.Value) return;
// Save the text that the user entered String text = bci.Text; //Load the current PDF document being viewed GdPicturePDF gdPDF = new GdPicturePDF(); gdPDF.LoadFromFile(CurrentFilePath.Text); //Add a new page to the document. The new page is appended to the //end of the document. var pictureStatus = gdPDF.NewPage(PdfPageSizes.PdfPageSizeLetter);
//Setting centimeters as the unit to be used for sizes, and the upper //left corer of a page for the orgin of the coordinate system gdPDF.SetMeasurementUnit(PdfMeasurementUnit.PdfMeasurementUnitCentimeter); gdPDF.SetOrigin(PdfOrigin.PdfOriginTopLeft); //Create a QR code on the current page, which is the new page that was //just created. The QR code will be 8 cm in size, 2 cm from the left of // the page, and 4 cm from the top of the page. Blue is being used for the pictureStatus = gdPDF.DrawBarcodeQrCode( text, BarcodeQREncodingMode.BarcodeQREncodingModeAlphaNumeric, BarcodeQRErrorCorrectionLevel.BarcodeQRErrorCorrectionLevelM, 0, 8, 2, 4, System.Drawing.Color.Blue ); //Also add the actual text that is encoded within the QR code to the page //in plain text. gdPDF.DrawText("Arial", 2, 13, text); //This is to be the first page in the document. The page on which the QR //code was placed is being set as the first page of the document. gdPDF.MovePage(gdPDF.GetPageCount(), 1); //Save the document to the file system gdPDF.SaveToFile(sfd.FileName); gdPDF.Dispose();
The GdPicturePDF class that was previously used for adding and loading a PDF document to add the QR code can also load the document in which we want to detect and read QR codes.
After converting the page to an image, we can retrieve each one of the QR code values one at a time.
For the application I am building here, these values of the QR codes (if any) will show in a window above the document.
IEnumerable<string> ReadBarcodeFromFirstPage(string filePath) { GdPicturePDF gdpPdf = new GdPicturePDF(); List<String> readBarcodes = new List<string>(); gdpPdf.LoadFromFile(filePath); gdpPdf.SelectPage(1); //Take an image of the first page of the document int imageID = gdpPdf.RenderPageToGdPictureImage(300, false); if (gdpPdf.GetStat() == GdPictureStatus.OK) { GdPictureImaging imaging = new GdPictureImaging(); //Scan the page for the presence of QR codes
if (imaging.BarcodeQRReaderDoScan(imageID, BarcodeQRReaderScanMode.BestQuality) == GdPictureStatus.OK) { //Get the value of each of the bar codes and save it to a list. Note //that the indices here are one based, not zero based. int barcodeCount = imaging.BarcodeQRReaderGetBarcodeCount(); for (var i = 1; i <= barcodeCount; ++i) { //Add the value of each QR code to a list readBarcodes.Add(imaging.BarcodeQRReaderGetBarcodeValue(i)); } } } return readBarcodes; }
Wrapping Up
With GdPicture.NET, adding a document viewer to an application is quick and easy. It is a solution for adding a viewing support for a large range of document viewing capabilities to your .NET application.
The GdPicture.NET controls also give your application the ability to edit and convert documents.
You can start developing with GdiPicture.NET today by downloading a trial version of the controls from (opens in a new tab)https://www.gdpicture.com/download-gdpicture/(opens in a new tab).
To learn more about GdPicture.NET visit (opens in a new tab)https://www.gdpicture.com/(opens in a new tab) or read the developer documentation from (opens in a new tab)https://www.gdpicture.com/guides/gdpicture//content/Overview.html(opens in a new tab).